How to Make Apple Scrap Vinegar at Home
Let’s be honest, apples usually get all the glory (and for good reason). Apple pie, apple crisp, caramel apples… But what about the scraps? You know, the peels and cores we toss in the compost like they’re nothing? Turns out, they’ve got benefits too. Let me show you how to make a simple Homemade Apple Scrap Vinegar!
One of my favorite things about making apple cider vinegar from scraps, besides making use of every part of the apple, is that you can use it in so many ways. From hair rinses to bone broth, this kitchen staple is worth its weight in apples.
Want more apple recipes? Try Homemade Apple Pie Filling, Apple Pie Coffee Cake, Apple Pie Chutney, Instant Pot Apple Butter, Sourdough Apple Pie Cupcakes, Instant Pot Applesauce, Sourdough Apple Pie Cobbler, Apple Cider Mini Muffins, or Sourdough Apple Pie Oat Bars.
This post contains affiliate links. As an Amazon associate or other affiliate, I earn from qualifying purchases. We try to recommend products we personally use or have used and trust. If you choose to purchase through our links in this post, we may receive a commission, at no extra cost to you. Read the full disclosure here.
What Is Apple Scrap Vinegar?
Apple scrap vinegar is unfiltered, raw vinegar made from your leftover apple peels and cores. It ferments over a few weeks, turning mere scraps into a tangy, golden liquid that’s great for cooking or even adding to your daily wellness routine.
Think of it as the little cousin of apple cider vinegar. A little less professional, but just as effective. The difference is that true apple cider vinegar is made with fermented apple juice, instead of the leftover apple parts. There are some differences in flavor and acidity, but both have their place in the kitchen!
Benefits of Making Apple Cider Vinegar at Home
Apple scrap vinegar is a simple way to reduce food waste, save money, and feel like a borderline homesteading hero. It’s cheap, easy, and slightly addictive. Seriously, you just leave apple peels and cores in a jar and a few days later, vinegar!
Homemade ACV (well, technically it’s apple scrap vinegar, but close enough!) is far cheaper than store-bought varieties, and chances are you already have the apples in your house.
You can use it in salad dressings, homemade cleaning products, and even natural remedies for digestion. Unfiltered and rich in probiotics, with no added chemicals or preservatives, you’ll love this easy tutorial.
Homemade Apple Cider Vinegar From Scraps
Tools
- Large Glass Jar(s)
- Coffee Filter or Cheesecloth
- Rubber band or string
- Fermentation Weights or Spring
- Large Spoon
- Fine mesh strainer
- Optional: pH strips (if you want to test acidity)
Ingredients
- Apple scraps (peels, cores, bruised pieces from making Apple Pie Filling or Applesauce)
- 1 tablespoon of sugar per cup of water
- Filtered or non-chlorinated water (chlorine can prevent proper fermentation)
- Optional: a couple of tablespoons of previously made apple scrap vinegar
Notes
- A pellicle may form on top of your vinegar, which is a good sign of healthy fermentation, but not required (it doesn’t always happen)
- ALWAYS toss out the entire batch if any mold has formed
Step-by-Step Apple Scrap Vinegar
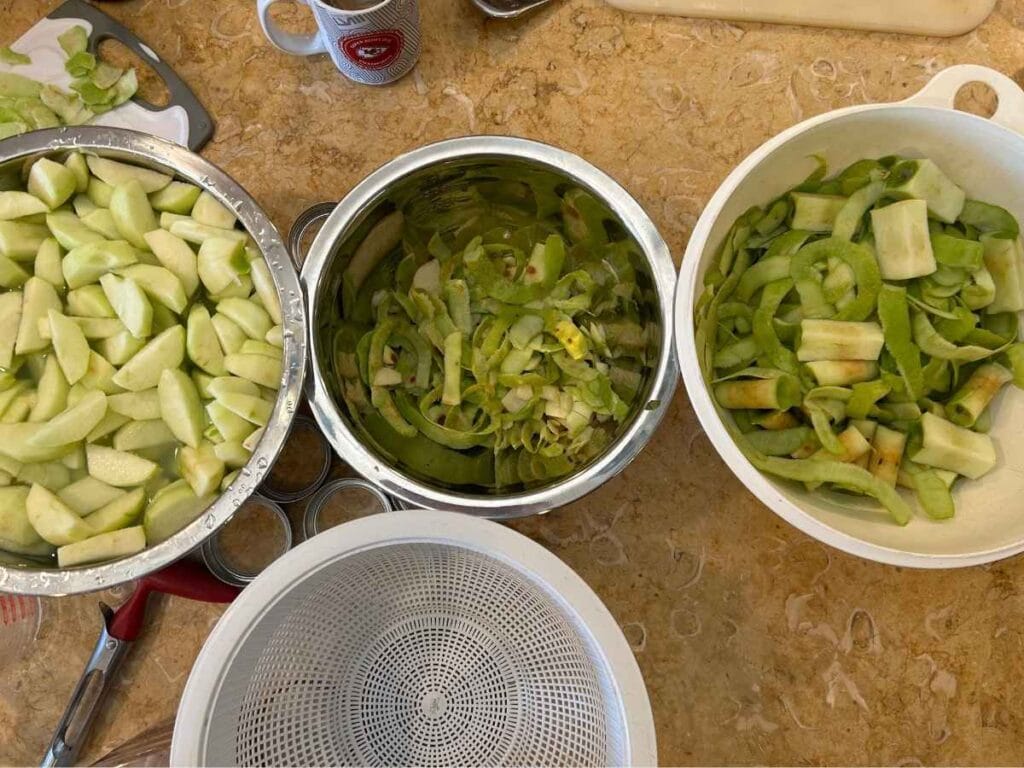
Gather Your Scraps: Whenever you’re baking with apples or making snacks, save the peels and cores. You can store them in the freezer until you have enough to fill a jar about ¾ full. We usually make a big batch in a 1/2 gallon jar. Do not use any moldy or rotten apple pieces!
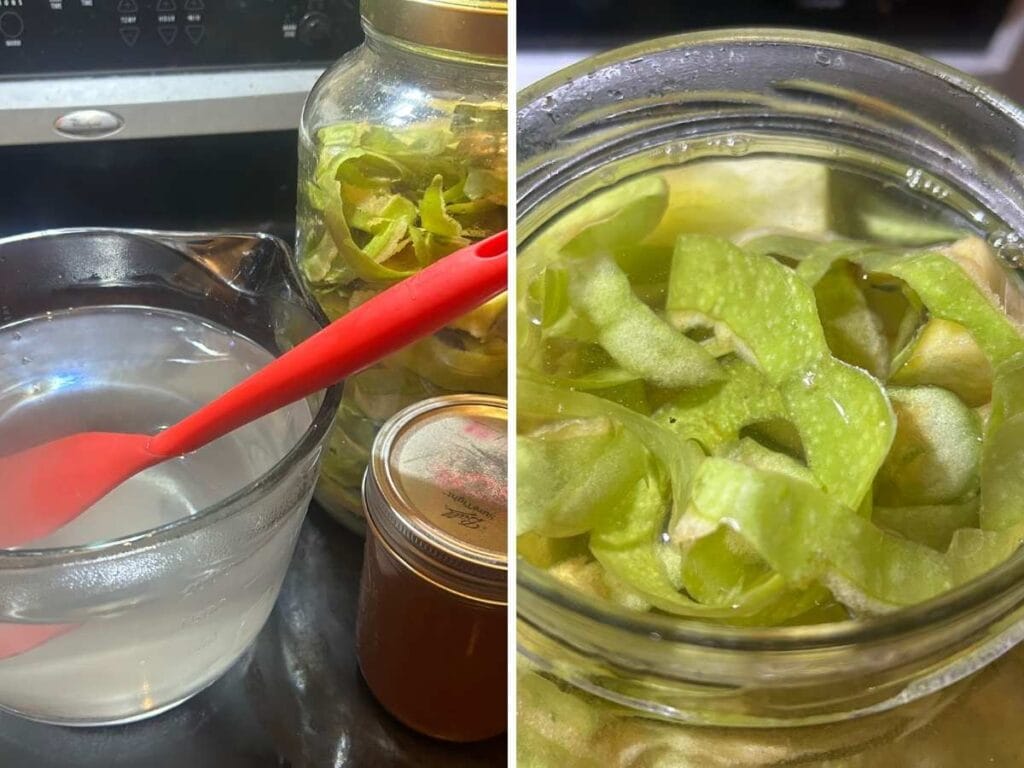
Sweeten the Scraps: Dissolve 1 tablespoon of sugar per cup of warm water. Pour the sugar water over the apple scraps until they’re completely covered. Sugar helps jumpstart the fermentation process. If needed, use a fermentation weight to keep the scraps submerged under the liquid.
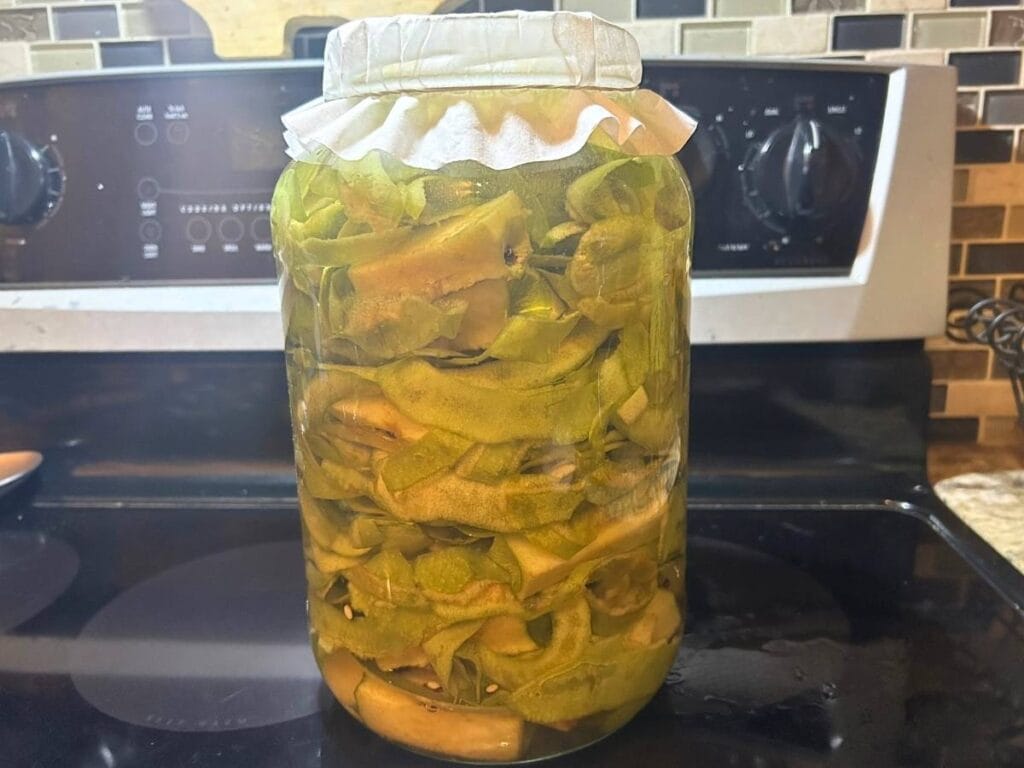
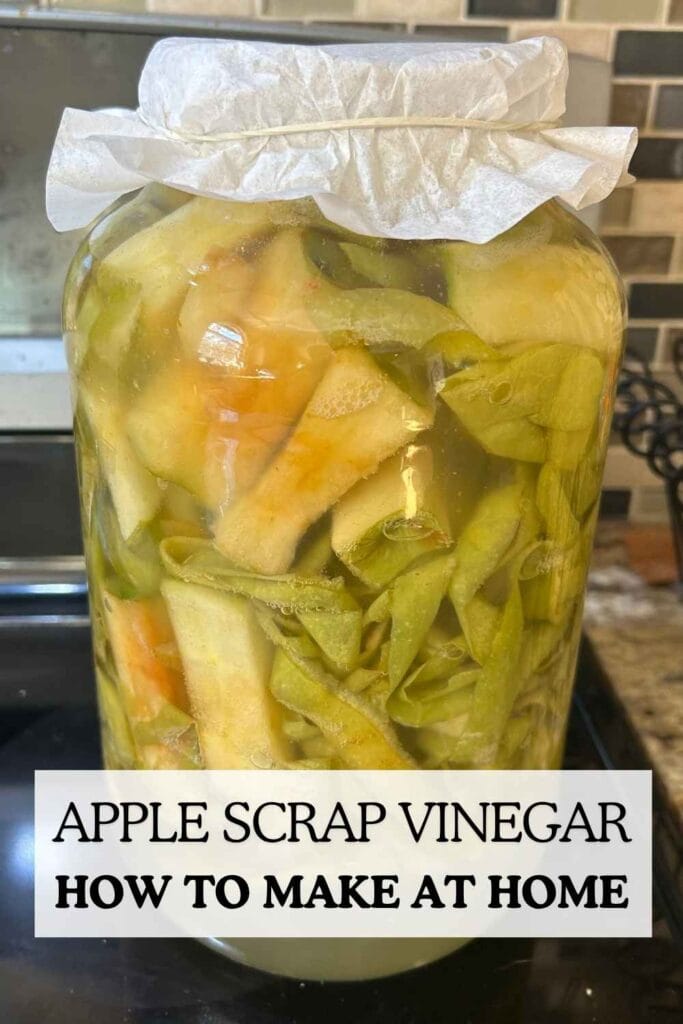
Cover: Cover the jar with a coffee filter or cheesecloth and secure with a rubber band. This helps keep any bugs or flies out while still letting the mixture breathe and not explode from pressure.
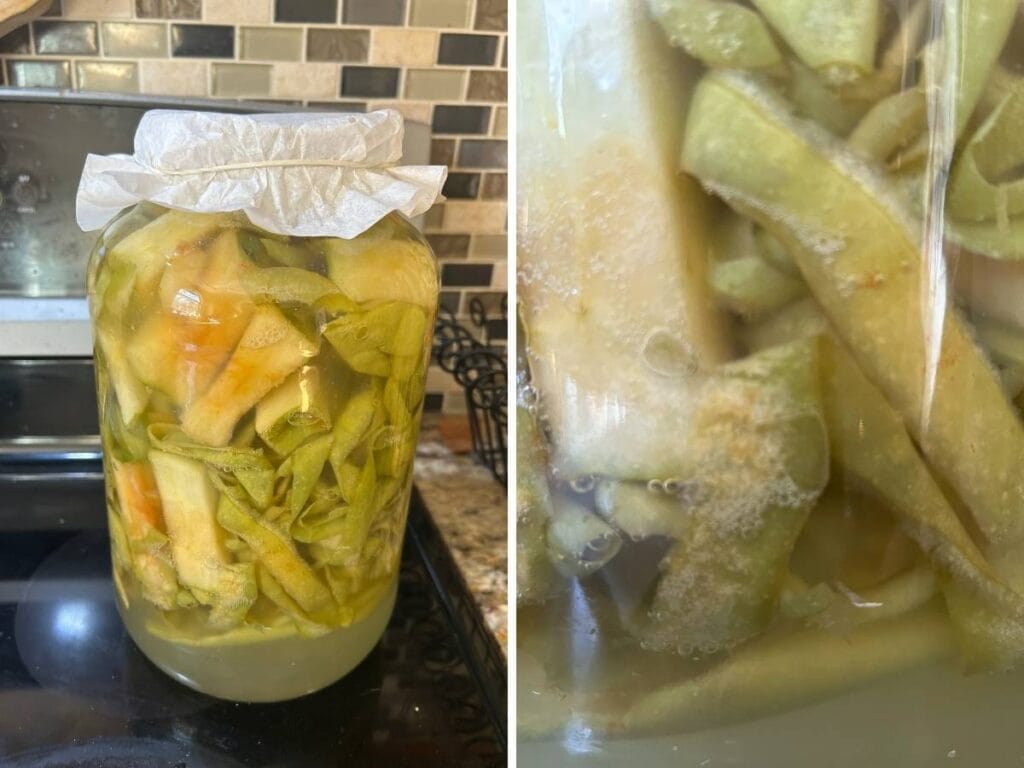
Ferment: Store the jar in a warm, dark place (the corner of my kitchen counter near the stove is where I keep mine). Stir your apple scrap mixture with a large spoon once every day or two, or just when you remember!
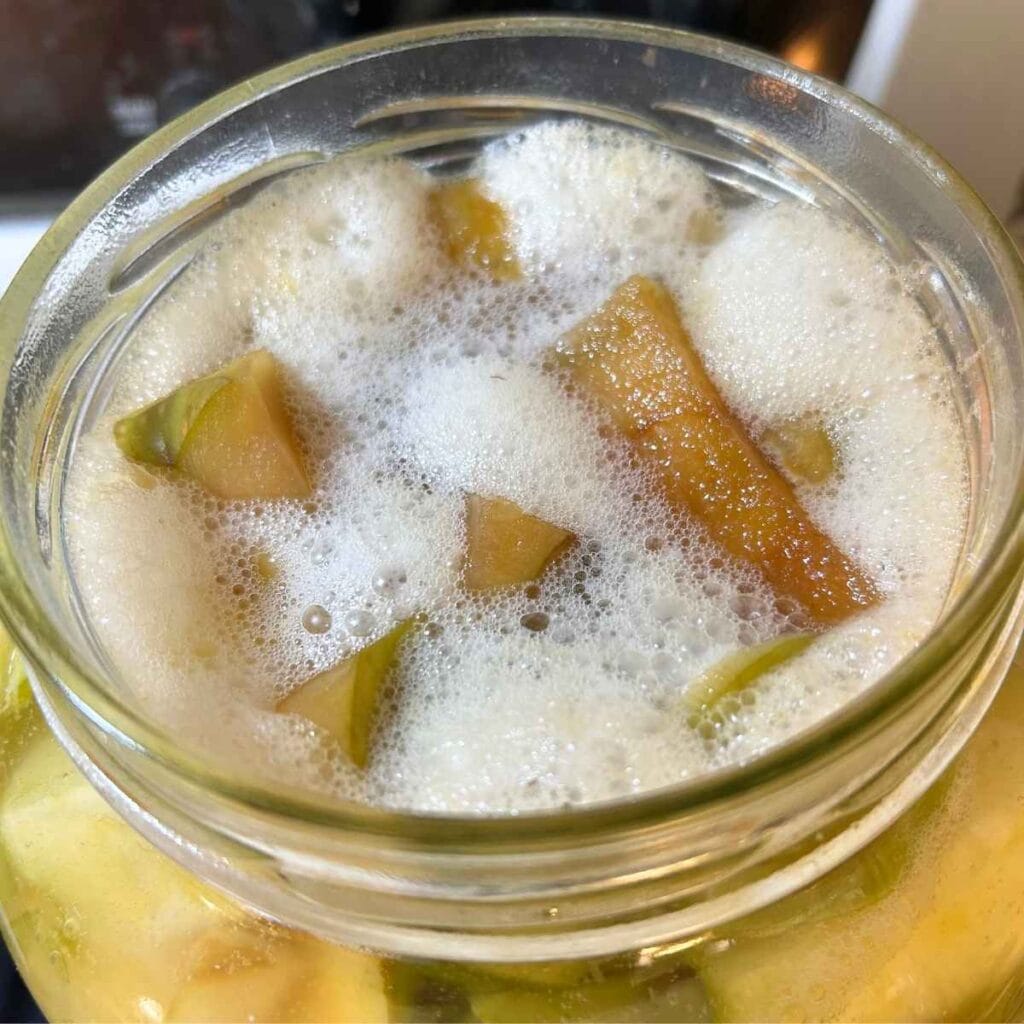
After a few days, you will probably notice some bubbles or white foam forming and may even start to smell a little tangy action. That’s a good sign that fermentation is happening!
Strain and Age: After about 2–3 weeks, strain out the apple solids and pour the liquid back into the jar. taste your vinegar to see if it’s to your liking on the tang scale. You can cover it again with a fresh coffee filter and let it ferment for another 3–4 weeks until it smells like vinegar and tastes very tangy. If you want to test the pH level, try to shoot for a pH between 2.5–3.5.
Store: After the vinegar is fermented to your taste, transfer it to a clean bottle with a lid and keep it in a cool, dark place or in the fridge. Apple scrap vinegar will last a very long time!
How to Use Apple Scrap Vinegar
This stuff is super versatile, and you can use in the kitchen or for cleaning. Try using it as a salad dressing base by mixing it with olive oil, lemon juice, and spices. You can also throw some in your bone broth to help bring out the nutrients or add more tang to your pickling brine!
You can also use it as a hair rinse by diluting it with water for some extra shine. Any smell will evaporate after a few minutes, don’t worry! Got some tummy trouble? Try a tablespoon mixed in water for a little digestion help (always consult your doc first!).
Apple scrap vinegar is one of those rewarding projects that brings you a little joy every time you check on it or use it. You’ll thank yourself next time you need some ACV mid-recipe and can just reach into the pantry.
Vinegar Tips
Preventing Mold: Keep the apple scraps and cores submerged under the sugar water and stir regularly to aerate and keep the bad guys at bay. Apple scraps not staying submerged? Use fermenting weights.
Speed Up Fermentation: Adding a bit of store-bought ACV, or some of your past batches, can help jump-start the fermentation process so it doesn’t take as long to get going.
Use Organic Apples: Organic apples are ideal for making the best quality vinegar since you are using the peels. You don’t want any chemicals fermenting!
Making your own apple scrap vinegar is like the gateway to DIY homesteading. It’s easy and surprisingly fun. Plus, you get to show off your mason jar full of liquid, no biggie. So next time you’re peeling apples, stash those scraps in the freezer for some fermenting fun.

How to Make Apple Scrap Vinegar at Home
Learn how to make a simple DIY apple scrap vinegar with simple ingredients! This apple cider vinegar recipe is perfect for beginners.
Ingredients
- Apple scraps (peels, cores, bruised pieces from making Apple Pie Filling or Applesauce)
- 1 tablespoon of sugar per cup of water
- Filtered or non-chlorinated water (chlorine can prevent proper fermentation)
- Optional: a couple of tablespoons of previously made apple scrap vinegar
Instructions
- Gather Your Scraps: Whenever you’re baking with apples or making snacks, save the peels and cores. You can store them in the freezer until you have enough to fill a jar about ¾ full. We usually make a big batch in a 1/2 gallon jar. Do not use any moldy or rotten apple pieces!
- Sweeten the Scraps: Dissolve 1 tablespoon of sugar per cup of warm water. Pour the sugar water over the apple scraps until they’re completely covered. Sugar helps jumpstart the fermentation process. If needed, use a fermentation weight to keep the scraps submerged under the liquid.
- Cover: Cover the jar with a coffee filter or cheesecloth and secure with a rubber band. This helps keep any bugs or flies out while still letting the mixture breathe and not explode from pressure.
- Ferment: Store the jar in a warm, dark place (the corner of my kitchen counter near the stove is where I keep mine). Stir your apple scrap mixture with a large spoon once every day or two, or just when you remember! After a few days, you will probably notice some bubbles or white foam forming and may even start to smell a little tangy action. That’s a good sign that fermentation is happening!
- Strain and Age: After about 2–3 weeks, strain out the apple solids and pour the liquid back into the jar. taste your vinegar to see if it's to your liking on the tang scale. You can cover it again with a fresh coffee filter and let it ferment for another 3–4 weeks until it smells like vinegar and tastes very tangy. If you want to test the pH level, try to shoot for a pH between 2.5–3.5.
- Store: After the vinegar is fermented to your taste, transfer it to a clean bottle with a lid and keep it in a cool, dark place or in the fridge. Apple scrap vinegar will last a very long time!
Notes
- A pellicle may form on top of your vinegar, which is a good sign of healthy fermentation, but not required (it doesn't always happen)
- ALWAYS toss out the entire batch if any mold has formed
Nutrition Information
Yield 60 Serving Size 1Amount Per Serving Calories 3
*This has not been evaluated by the FDA. Nutrition Label may not be accurate. This label has been automatically pulled, and ingredients may not be categorized correctly.
FAQs
Absolutely! As long as they’re not moldy or rotten, you’re good to go. Ugly apples still have a purpose!
Usually, that’s just kahm yeast, which is harmless. Mold will be fuzzy and often it is green or black—if you see that, toss it and try again. If there is any question, better to throw it out.
As long as it smells and tastes vinegary, it’s good. Store it sealed in a dark place. I keep mine in the fridge.
Nope! The wild yeasts in the air and on the apples will do the job, but you can add a little of your last batch of apple scrap vinegar to help things along quicker.
For sure—just make sure the scraps stay submerged and scale the sugar-water ratio accordingly.
The information shared on this blog is for educational and informational purposes only. I am not a medical professional, food safety expert, or licensed nutritionist. All fermentation recipes and techniques are based on personal experience and research and are intended to inspire your own exploration. Please use your best judgment and consult trusted sources or professionals when trying any fermentation method. Always follow proper hygiene and safety practices, and discard any batch that shows signs of mold, spoilage, or contamination. By using the information provided here, you acknowledge that you do so at your own risk. I am not responsible for any adverse outcomes, illnesses, or damages resulting from the use or misuse of the content on this site.