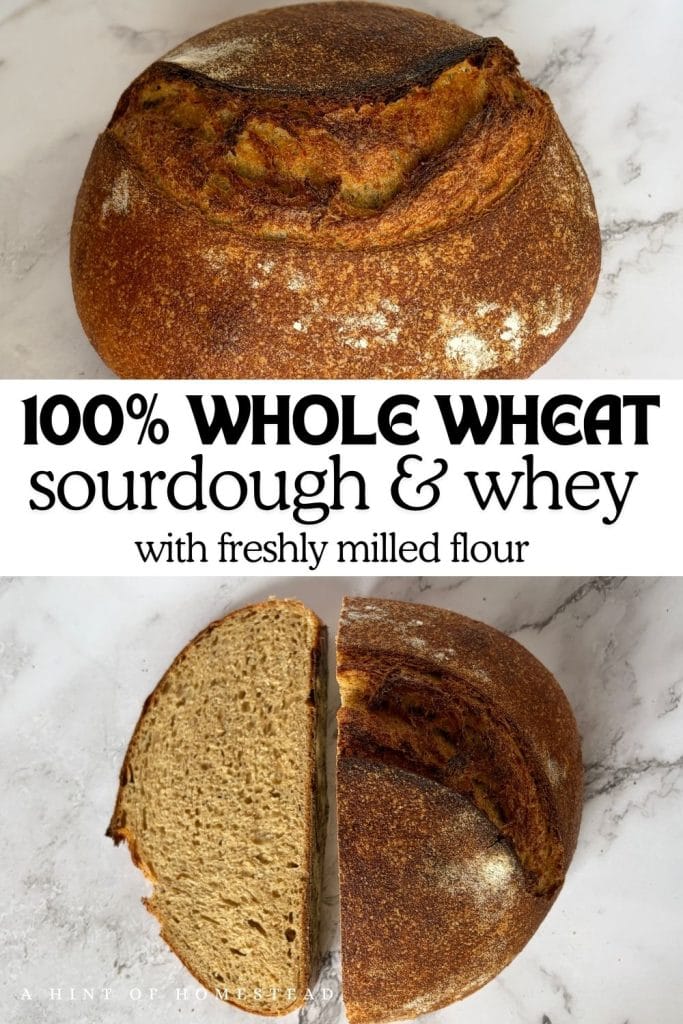
Sourdough Whey Bread with Fresh Milled Flour (Same-Day Recipe)
This same day whole wheat sourdough whey bread is made using 100% fresh milled flour and the leftover liquid from making yogurt or cheese! This recipe will give you a delicious, soft, and crusty loaf! You’ll be baking this recipe all year long and your house will smell amazing to boot.
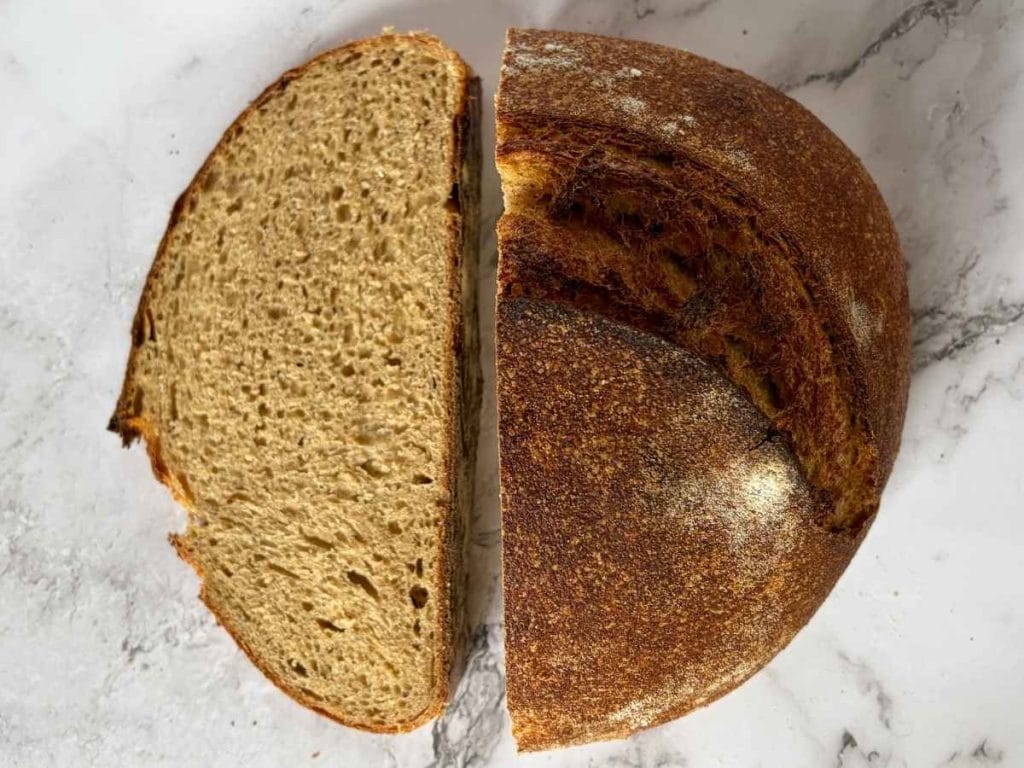
If you thought fresh milled sourdough bread wasn’t simple and totally doable, you may change your mind after trying this recipe! It’s wholesome, uses only a few ingredients, and tastes amazing. There’s more nutrition in every bite thanks to freshly milled whole grains (this recipe uses both hard white wheat and spelt)
Looking for more fresh milled flour sourdough recipes? Our Simple Sourdough Bread, Sourdough Bagels and Sourdough Buttermilk Biscuits are always a win in our house. Or impress your family with Sourdough Sticky Pecan Buns, Sourdough Carrot Cake Focaccia, Sourdough Country Loaf, Sourdough French Bread, or Sourdough English Muffins.
New to baking with freshly milled flour? Take a walk through our Fresh Milled Flour Beginner’s Guide or our Grain Guide.
This post contains affiliate links. As an Amazon associate or other affiliate, I earn from qualifying purchases. We try to recommend products we personally use or have used and trust. If you choose to purchase through our links in this post, we may receive a commission, at no extra cost to you. Read the full disclosure here.
Why You’ll Love Using Whey in Sourdough Bread
Whey helps your sourdough rise better, taste richer, and feel softer, all while keeping your ingredients simple and your process easy. It helps bring a soft, tender crumb (yes, even with 100% whole wheat) to your freshly milled loaf that you will absolutely love.
Because whey is naturally rich in lactose and minerals, you can think of it as a natural dough enricher. Your dough gets a little more hydrated, more elasticity, and is a bit easier to handle, which is great for a same‑day bake where you want reliable fermentation and a beautiful oven spring.
You’ll also love the subtle flavor profile. Whey softens out the tang of sourdough, giving your loaf a mellow, buttery warmth. And if you’re already straining yogurt or making cheese at home, using whey turns your bread into a true nose‑to‑tail bake: nothing wasted, everything nourishing.
- Whey improves texture, moisture, and crumb structure
- Whey enhances flavor and is preferred in blind taste tests (source)
- Acidity of whey can help with fermentation and a longer shelf life
Sourdough Whey Bread Recipe
Tools
- Grain Mill
- Stand Mixer with Dough Hook Attachment
- Kitchen Scale
- Bench Scraper
- Banneton or Bowl
- Clean Kitchen Towel
- Parchment Paper or Silicone Baking Mat
- Dutch Oven
- Bread Lame
- Kitchen Thermometer
- Rice Flour for dusting
- Cooling Wire Rack
Ingredients
- 410g Whey (liquid), cool
- 450g Hard White Wheat Berries
- 60g Spelt Berries
- 100g Sourdough Starter, active
- 10g Salt
Notes:
- I usually start the dough around 8am so it’s baked, cooled, and ready in time for dinner
- I like to use whey (liquid from making yogurt) from the fridge so it’s cold to even out the warm, freshly milled flour
- Do not use whey powder in this recipe – we use the liquid from cheese or yogurt making.
- I prefer using a Dutch oven for sourdough bread baking, but you can experiment with other vessels (baking times may vary)
- My home is around 72 degrees in summer and 67 degrees in winter, so bulk rise timing may vary depending on the temperature of your home
- You can add a couple of ice cubes to the Dutch oven for more steam if you want when baking
- I find the loaf browns just fine with the Dutch oven lid on, but you can take the lid off for the last 5-10 of baking minutes if needed.
- I usually double this recipe and make two (one to eat and one to freeze)
Step-by-Step Fresh Milled Sourdough Whey Bread
Making the Dough
Autolyse: In the bowl of your mixer add whey, then mix in fresh milled flour to get a shaggy dough. Just mix until no dry bits remain. Cover and let it rest for 30 minutes. This helps soften the bran and improves dough structure, so don’t skip it.
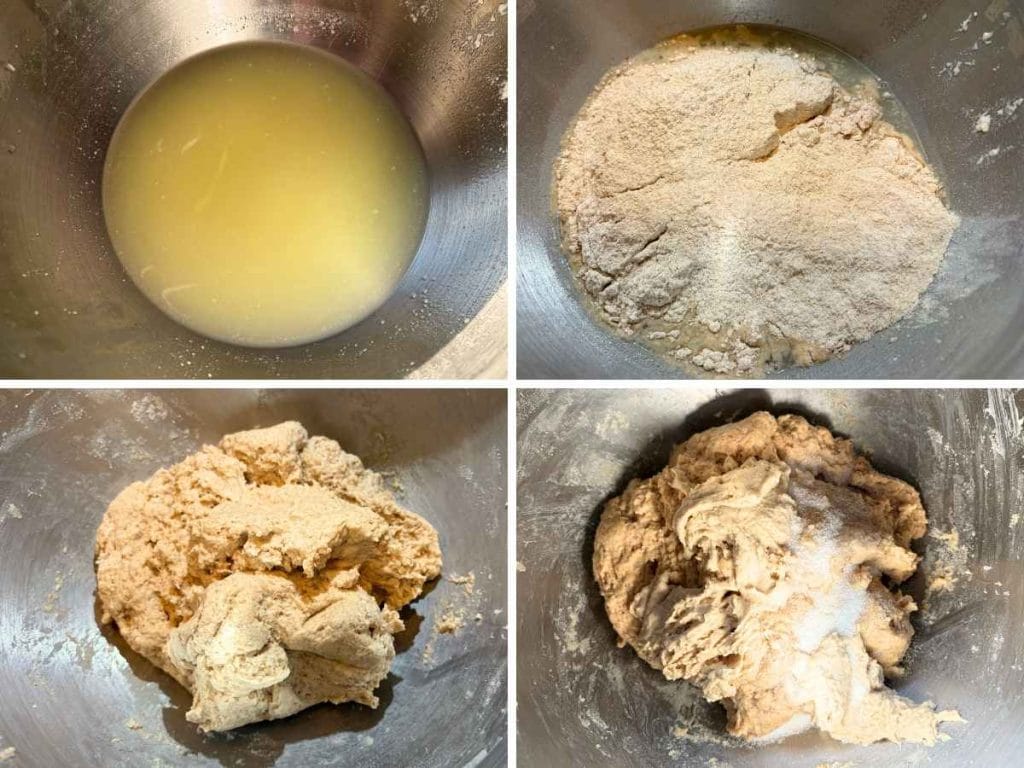
Add Starter & Salt: Add your sourdough starter and salt to the dough and knead for about 5 minutes, or until the dough reaches (or nearly) windowpane. This may take longer in different mixer or by hand.
Coil Folds: Perform 2 sets of coil folds immediately after kneading, no need to wait to do this. I do them one right after each other to help situate the dough. You can also do another set of coil folds after 30 minutes if you remember and want to do it (I sometimes forget).
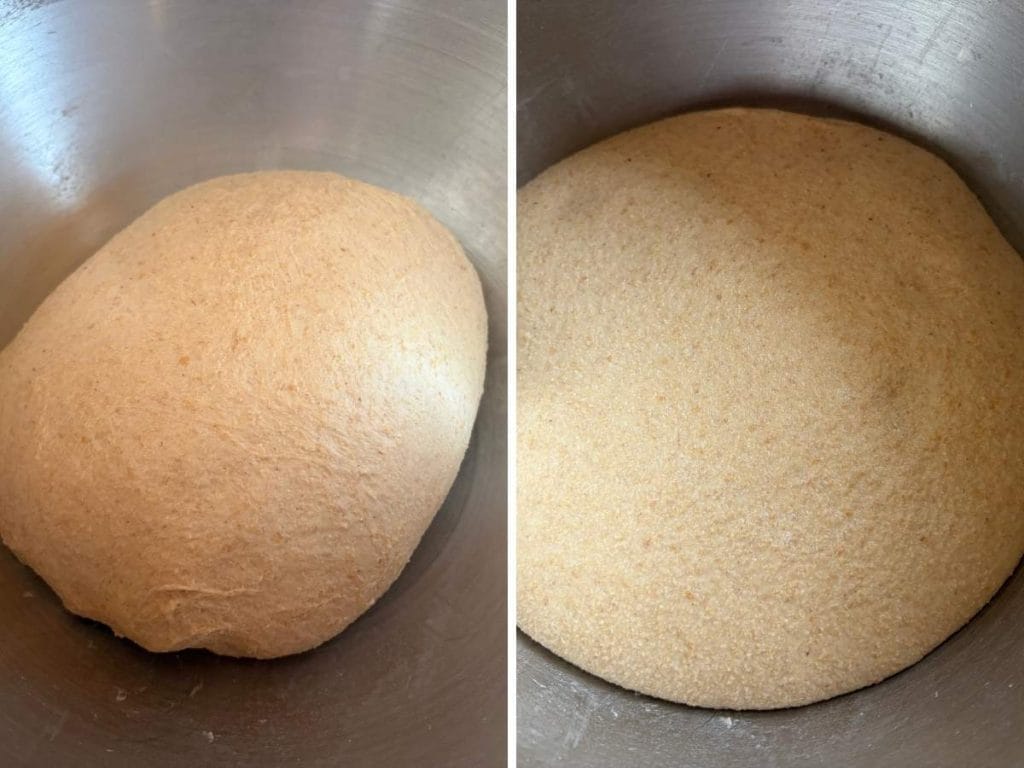
Bulk Fermentation: Cover and let the dough rise at room temperature for about 4 hours (depending on your home temperature). It will not double in size, but will be visibly bulkier and a bit jiggly.
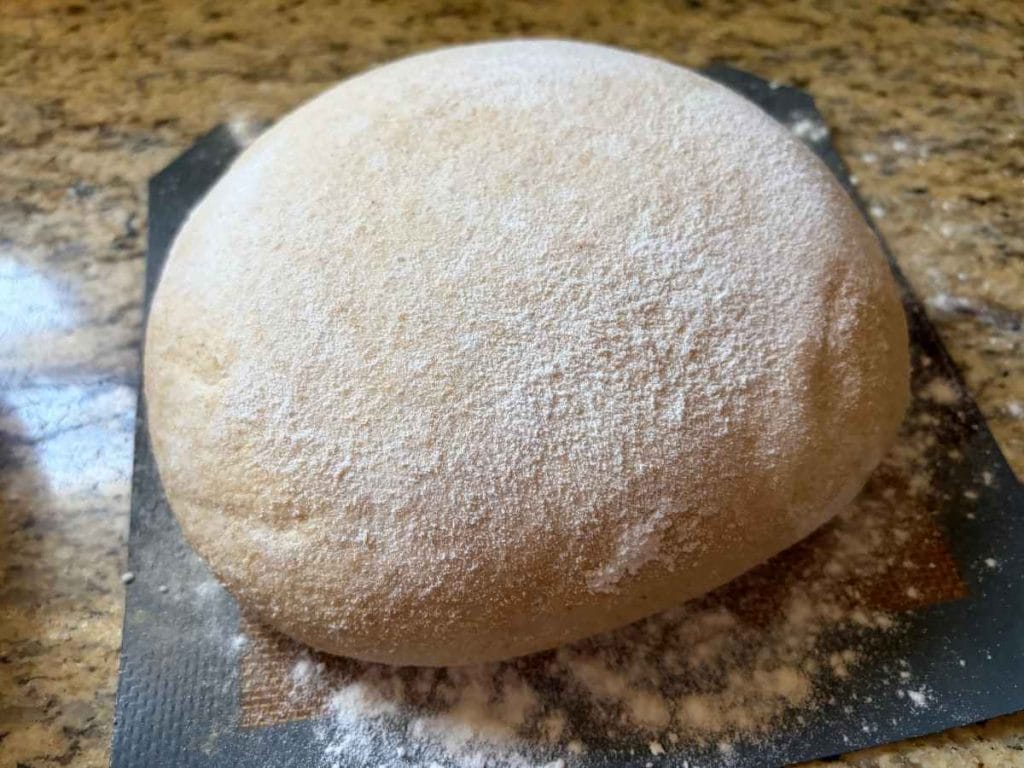
Shape the Dough: Turn the dough onto a lightly floured surface and laminate the dough. This just means gently stretching it into a large square, then folding over the sides before pre-shaping it into your round. This helps create some of those holes we love! Cover with a damp tea towel for 15 minutes, then do a final shape.
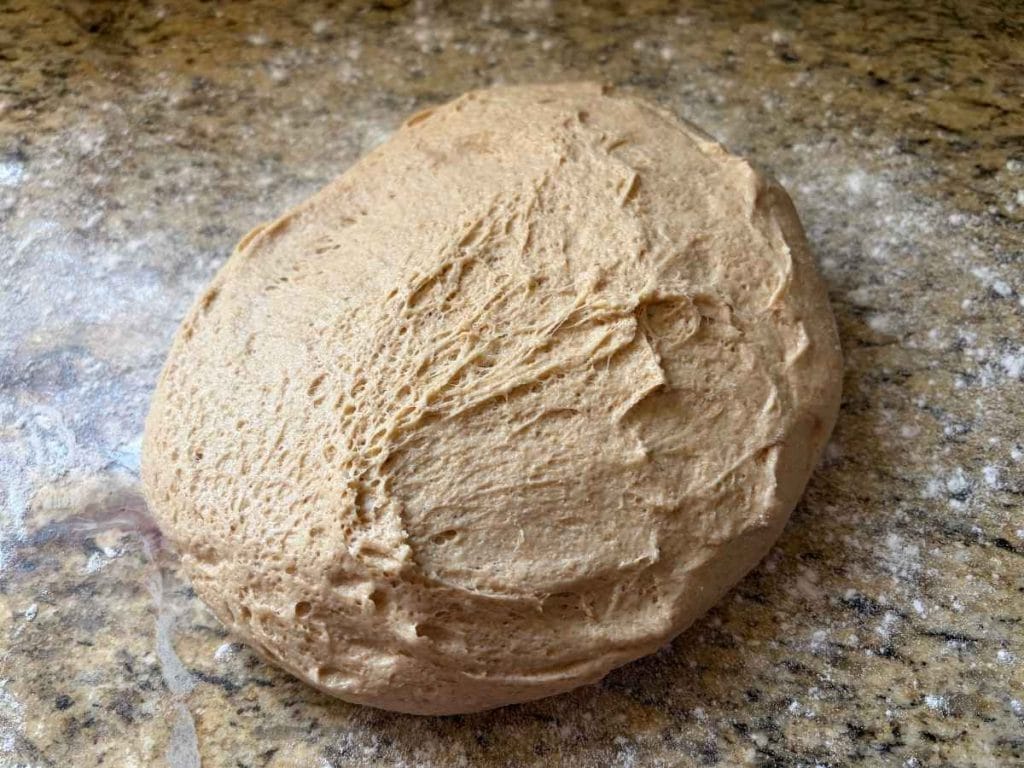
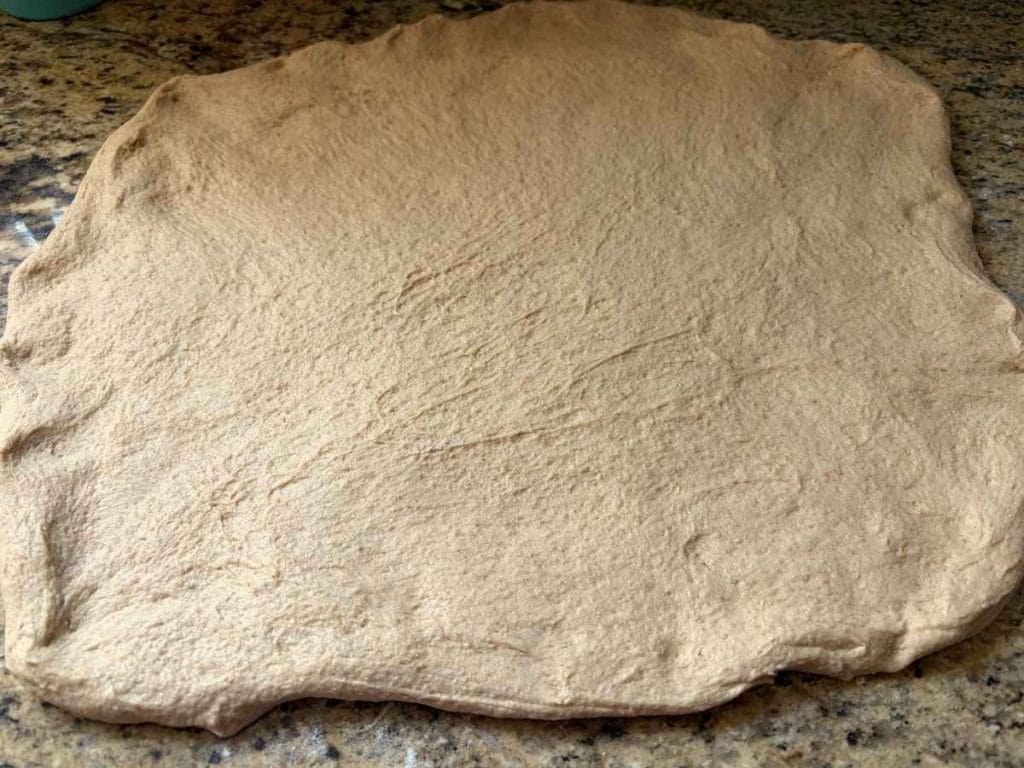
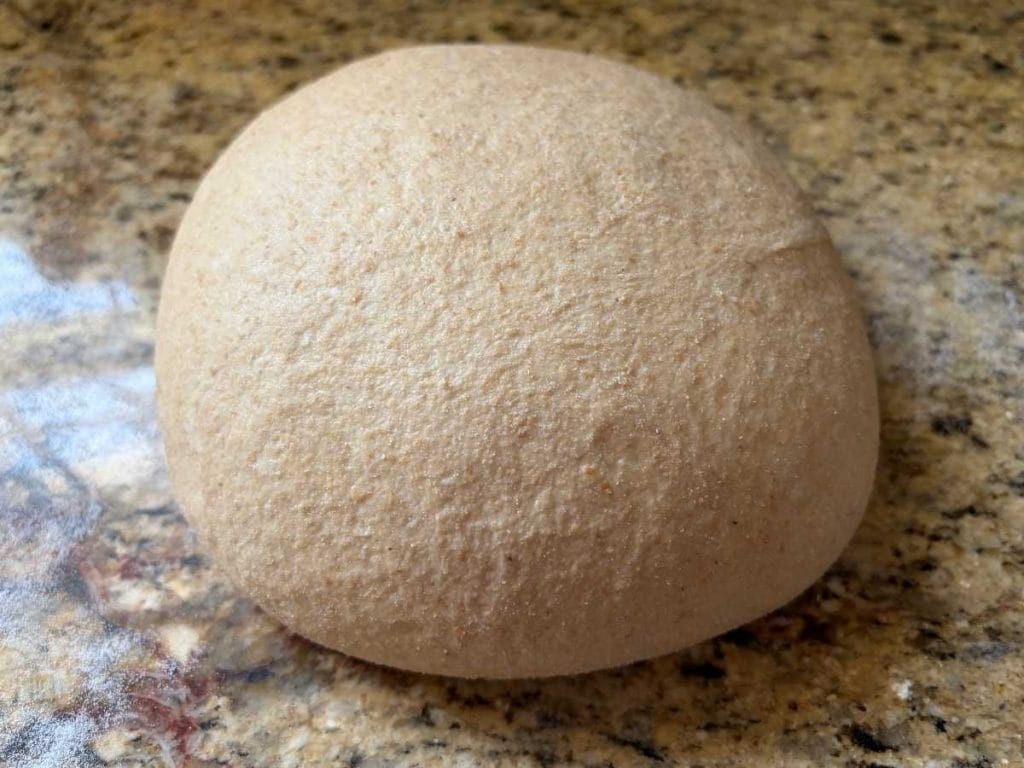
Fridge Proof: Place the shaped dough into a floured banneton or bowl. Cover with a damp tea towel and place in the fridge for anywhere between 2 and 6 hours. I love that this step works well for my ever-changing busy schedule!
Room Temp Rise: When ready to bake, remove the banneton from the fridge and set it on the counter with the tea towel still covering it for 45 minutes. The dough will have continued to rise some in the fridge.
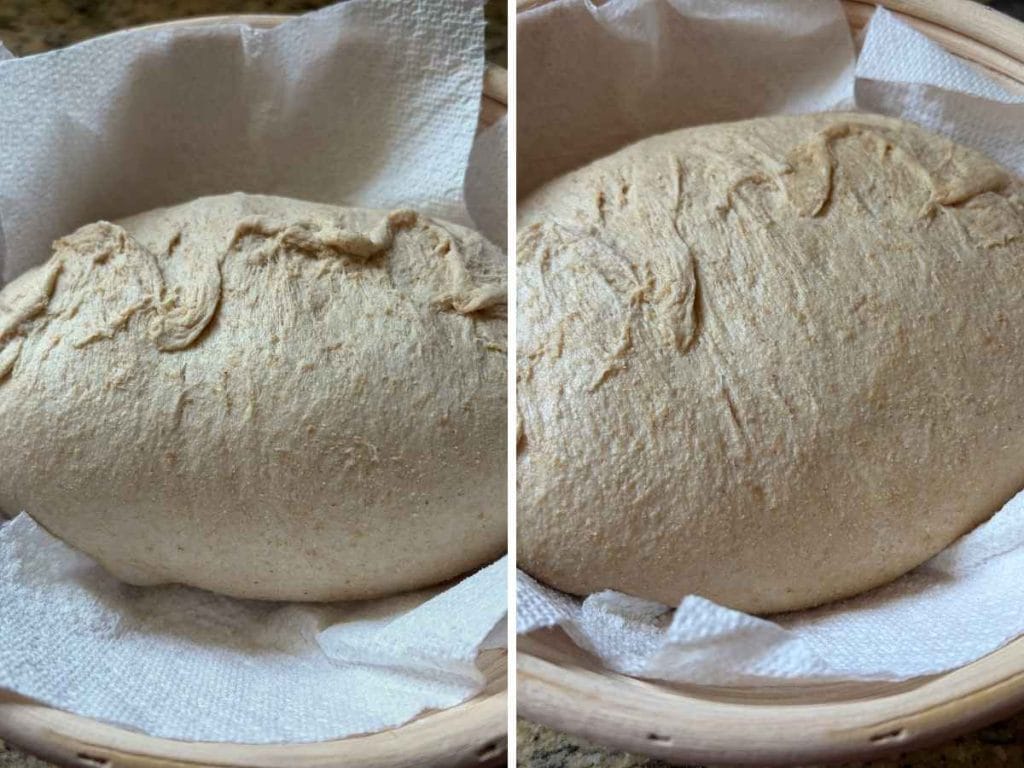
Preheat: While the dough is coming to room temperature, preheat your oven, with the Dutch oven inside, to 500°F for at least 30 minutes.
Baking the Bread
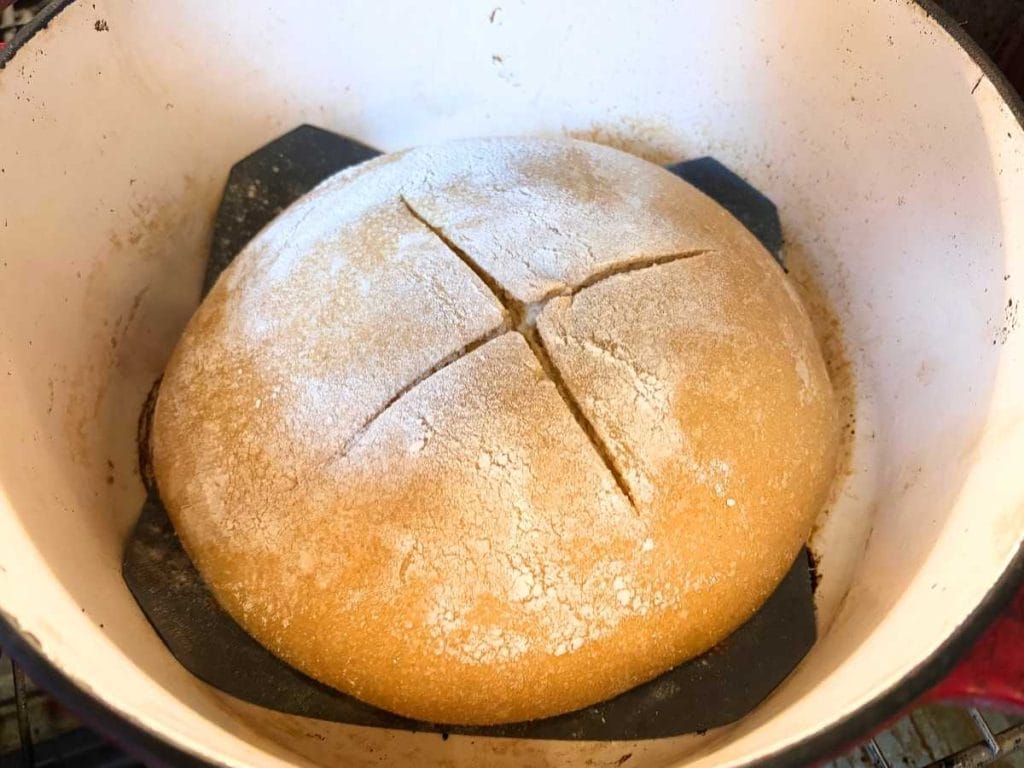
Bake: Place dough on a lightly floured silicone baking mat or parchment paper. Carefully place the loaf in a preheated Dutch oven (with lid on) and immediately lower the oven temperature to 450°F. Bake for 6 minutes, then score the bread with a lame. This delayed scoring helps prevent a flat loaf in my experience. Re-cover and continue baking for another 30-35 minutes. This sourdough whey bread is done when the internal temperature reaches 205-210°F.
Cool: Remove the baked sourdough whey loaf from the Dutch oven and place it on a cooling rack. Let it cool completely before slicing. The wait is the hardest part.
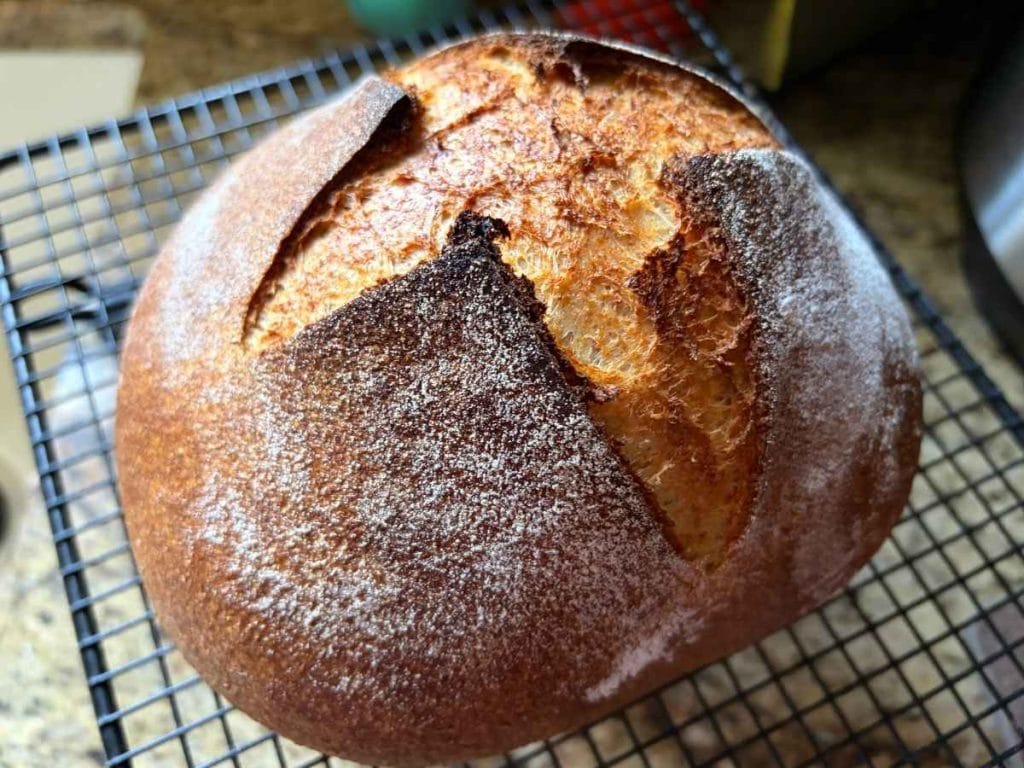
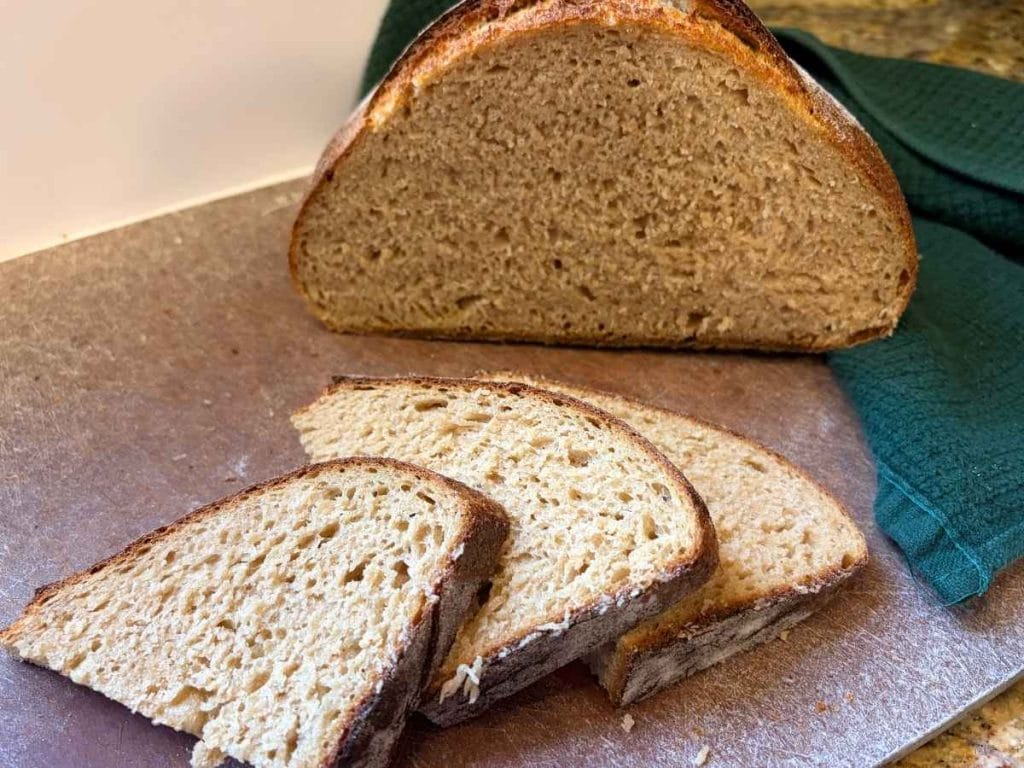
If you’ve been hesitant about baking whole wheat bread with fresh milled flour, this is your sign to try it again with this sourdough whey bread recipe. You’ll have a sourdough bread that is hearty, nourishing, and delicious.
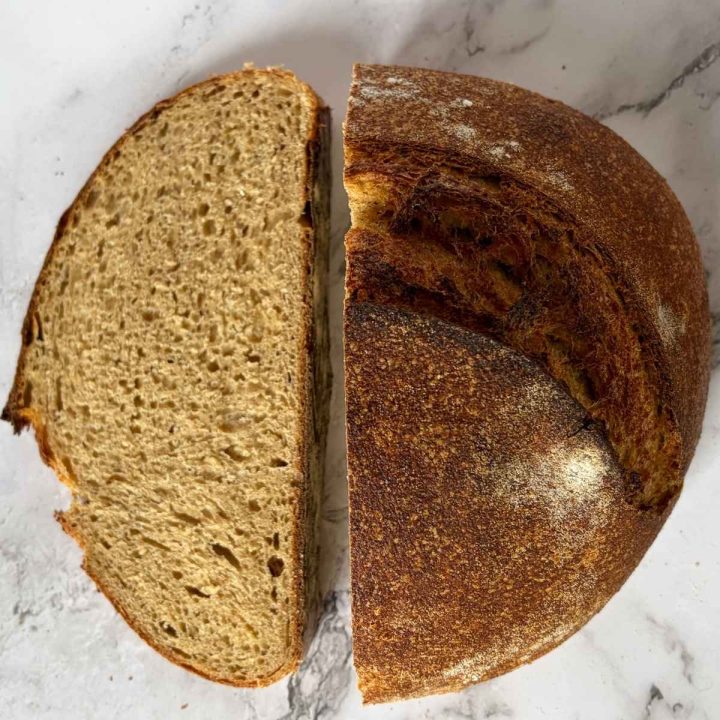
Sourdough Whey Bread with Fresh Milled Flour
Learn how to make amazing same-day sourdough whey bread with fresh milled flour. Enjoy an easy wholesome loaf with simple ingredients.
Ingredients
- 410g Whey (liquid)
- 450g Hard White Wheat Berries
- 60g Spelt Berries
- 100g Sourdough Starter, active
- 10g Salt
Instructions
- Autolyse: In the bowl of your mixer add whey, then mix in fresh milled flour to get a shaggy dough. Just mix until no dry bits remain. Cover and let it rest for 30 minutes. This helps soften the bran and improves dough structure, so don't skip it.
- Add Starter & Salt: Add your sourdough starter and salt to the dough and knead for about 5 minutes, or until the dough reaches (or nearly) windowpane. This may take longer in different mixer or by hand.
- Coil Folds: Perform 2 sets of coil folds immediately after kneading, no need to wait to do this. I do them one right after each other to help situate the dough. You can also do another set of coil folds after 30 minutes if you remember and want to do it (I sometimes forget).
- Bulk Fermentation: Cover and let the dough rise at room temperature for about 4 hours (depending on your home temperature). It will not double in size, but will be visibly bulkier and a bit jiggly.
- Shape the Dough: Turn the dough onto a lightly floured surface and laminate the dough. This just means gently stretching it into a large square, then folding over the sides before pre-shaping it into your round. This helps create some of those holes we love! Cover with a damp tea towel for 15 minutes, then do a final shape.
- Fridge Proof: Place the shaped dough into a floured banneton or bowl. Cover with a damp tea towel and place in the fridge for anywhere between 2 and 6 hours. I love that this step works well for my ever-changing busy schedule!
- Room Temp Rise: When ready to bake, remove the banneton from the fridge and set it on the counter with the tea towel still covering it for 45 minutes. The dough will have continued to rise some in the fridge.
- Preheat: While the dough is coming to room temperature, preheat your oven, with the Dutch oven inside, to 500°F for at least 30 minutes.
- Bake: Place dough on a lightly floured silicone baking mat or parchment paper. Carefully place the loaf in a preheated Dutch oven (with lid on) and immediately lower the oven temperature to 450°F. Bake for 6 minutes, then score the bread with a lame. This delayed scoring helps prevent a flat loaf in my experience. Re-cover and continue baking for another 30-35 minutes. This sourdough whey bread is done when the internal temperature reaches 205-210°F.
- Cool: Remove the baked sourdough whey loaf from the Dutch oven and place it on a cooling rack. Let it cool completely before slicing. The wait is the hardest part.
Notes
- I usually start the dough around 8am so it's baked, cooled, and ready in time for dinner
- I like to use whey from the fridge so it's cold to even out the warm, freshly milled flour
- I prefer using a Dutch oven for sourdough bread baking, but you can experiment with other vessels (baking times may vary)
- My home is around 72 degrees in summer and 67 degrees in winter, so bulk rise timing may vary depending on the temperature of your home
- You can add a couple of ice cubes to the Dutch oven for more steam if you want when baking
- I find the loaf browns just fine with the Dutch oven lid on, but you can take the lid off for the last 5-10 of baking minutes if needed.
- I usually double this recipe and make two (one to eat and one to freeze)
Nutrition Information
Yield 12 Serving Size 1 sliceAmount Per Serving Calories 183Total Fat 1gSaturated Fat 0gUnsaturated Fat 1gCholesterol 5mgSodium 325mgCarbohydrates 34gFiber 5gSugar 1gProtein 7.7g
*This has not been evaluated by the FDA. Nutrition Label may not be accurate. This label has been automatically pulled, and ingredients may not be categorized correctly.
FAQS
Sure! Replace the whey with either milk or water plus a tsp of lemon juice. You can also try buttermilk.
This can be due to under-fermentation, over-fermentation, or not enough gluten development. Keep trying!
Fresh milled flour offers more flavor and nutrients because it retains the full grain, including bran and germ.
Look for around a 50% rise, slight jiggle, and bubbles—it may not necessarily double.
Yes! Once fully cooled, wrap and place either the entire loaf or slices in a freezer bag for 1-2 months. Thaw on the counter when ready to eat.